

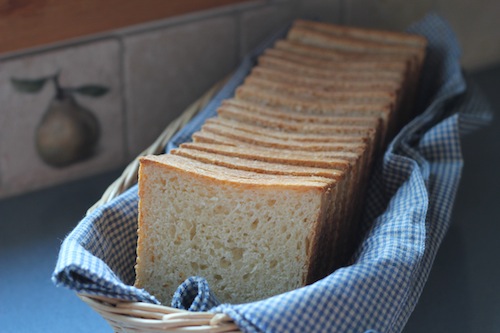


As my little ones are growing older, it seems harder to keep bread in the house! I'm finding going with a bigger bread pan is certainly the way to go for us. I was originally intrigued by this Pullman loaf (also known as pain de mie) because I thought it would be perfect for tea sandwiches-you know, those darling little triangles of delicious spreads.......my husband calls it "girly food". The bread bakes up perfectly square, eliminating any need to cut off the crust. While I anticipate getting a lot of use out of this pan for fun things like teas, I think it will be even more helpful making our daily bread. The recipe below turned out great, so I wondered if you could try any others with this pan. I then made my English muffin bread (the one with the honey) and put the entire batter in this large pullman-it was wonderful! The squared sides makes it perfect toasting bread for breakfast egg sandwiches. Since it only bakes for about 25 to 30 minutes, I actually did not cover the bread with the lid while baking. Now back to the Pullman bread and why is it called "Pullman" anyway? It derived its name from its use in the compact kitchens of the Pullman railway cars. Simply put, this bread took up far less space than the standard round-topped loaves, which maximized the use of space in the Pullman kitchen. The Pullman Company is credited with inventing the lidded baking pans used to create the square loaves. It is a very good sandwich bread and with the amount of butter in it, it would probably make great grilled cheese!
2/3 cup (5 3/8 ounces) milk
1 cup (8 ounces) water
6 tablespoons (3 ounces) butter
2 1/4 teaspoons salt
3 tablespoons (1 1/4 ounces) sugar
1/4 cup (1 1/8 ounces) Baker's Special Dry Milk or nonfat dry milk
3 tablespoons (1 1/4 ounces) potato flour (I used instant potato flakes)
4 3/4 cups (20 ounces) King Arthur Unbleached All-Purpose Flour
2 teaspoons instant yeast
In a large bowl, combine the milk, water, butter, salt and sugar. Add the dried milk, flours and yeast, stirring till the dough starts to leave the sides of the bowl. Transfer the dough to a lightly greased surface, oil your hands, and knead it for 5 to 8 minutes, or until it's smooth and supple. Transfer the dough to a lightly greased bowl, cover the bowl, and allow the dough to rise until puffy though not necessarily doubled in bulk, about 1 1/2 hours, depending on the warmth of your kitchen. Lightly grease a 13 x 4 USA Pan™ Pullman Loaf Pan. Transfer the risen dough to a lightly greased work surface, shape it into a 13-inch log, and fit it into the pan. Cover the pan with lightly greased plastic wrap, and allow the dough to rise until it's just below the lip of the pan, 45 minutes to 1 hour, depending on the warmth of your kitchen. Remove the plastic, and carefully place the cover on the pan, let it rest an additional 10 minutes while oven preheats to 350°F. Bake the bread for 25 minutes. Remove the pan from the oven, carefully remove the lid, and return the bread to the oven to bake for an additional 20 minutes, or until it tests done; an instant-read thermometer inserted into the center will register 190°F. Remove the bread from the oven, and turn it out of the pan onto a rack to cool completely.
These pans are great! I can't believe how fast the bread comes out and the pans are spotless! Totally enjoy your recipes and suggestions for cooking equipment. I love cooking with the cooks! :) Have a great day!
ReplyDeleteLove ya,
Anne